GPS & Location
Why Location Matters
Nexus Telemetry uses your location to display your terminal’s position, provide local weather data, match satellites in the Starlink Viewer (Pro), and record GPS routes during sessions (Pro).
GPS Sources
Nexus Telemetry supports five location sources. You can configure one or more and the app will automatically fall back between them if one becomes unavailable.
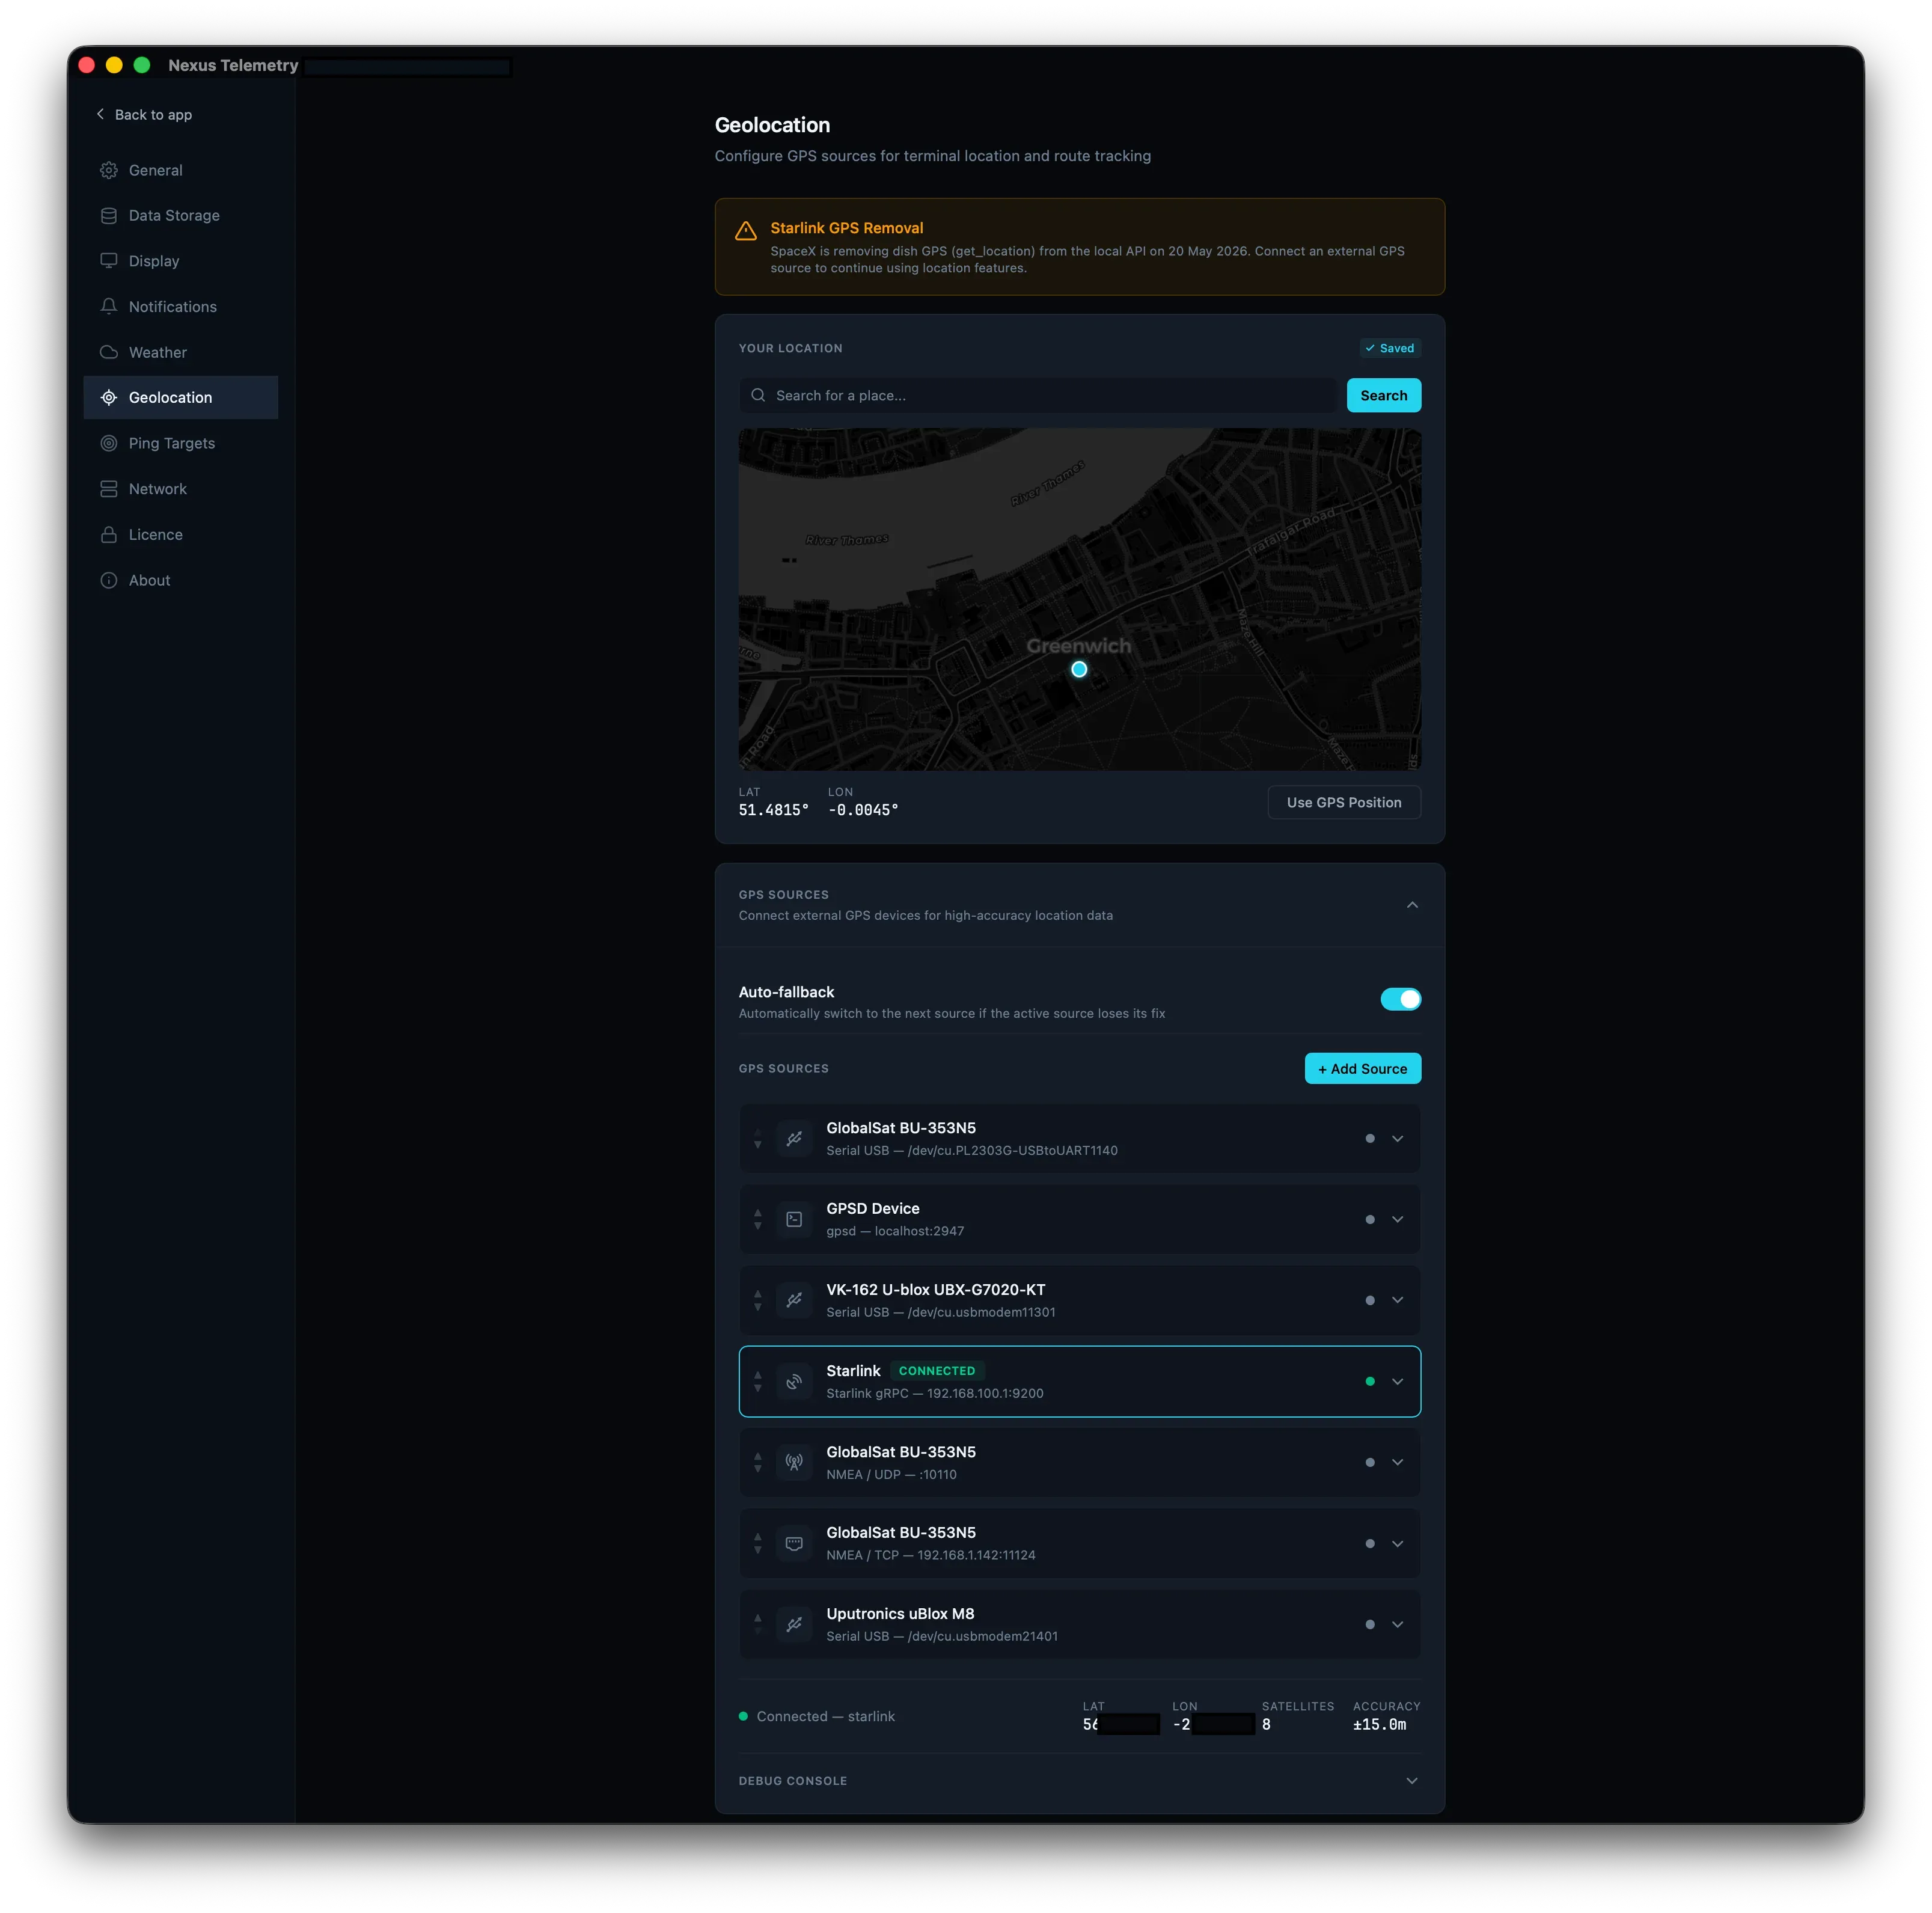
Open Settings → Geolocation to manage your location sources.
Adding a GPS Source
Click + Add Source to add a new GPS source. Give it a name and select the source type.
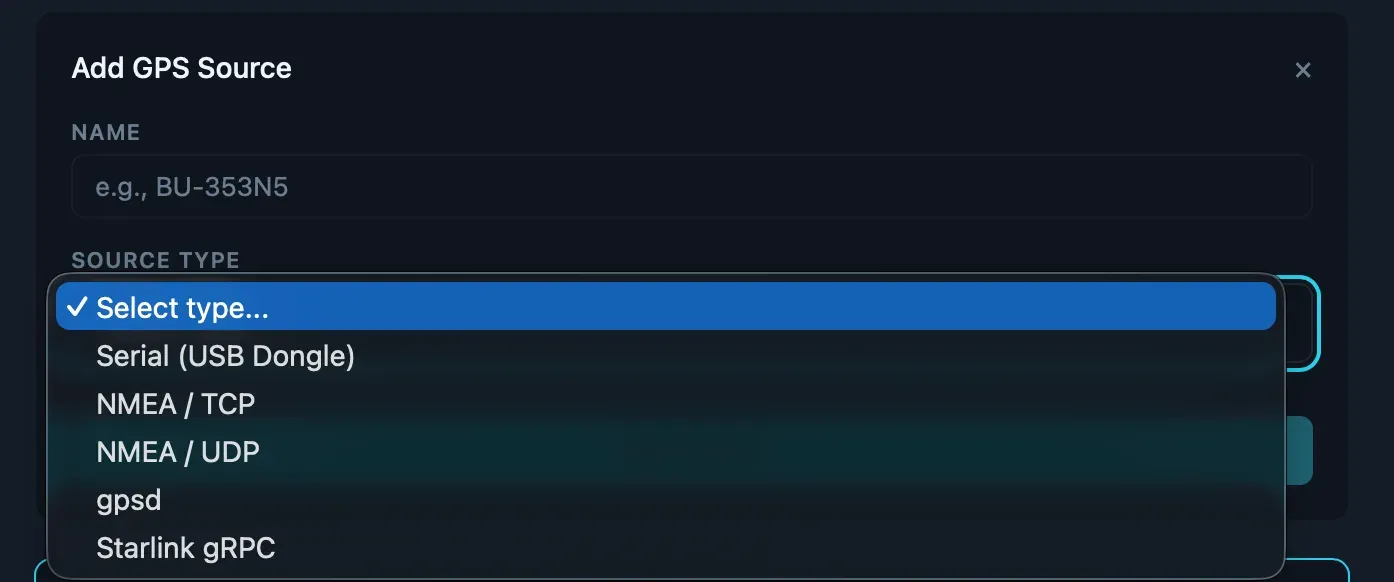
The available source types are:
- Serial (USB Dongle) — connect a USB GPS receiver directly
- NMEA / TCP — receive NMEA sentences over a TCP connection
- NMEA / UDP — listen for NMEA sentences broadcast over UDP
- gpsd — connect to an existing gpsd instance
- Starlink gRPC — read GPS from the Starlink dish (being deprecated)
Each source type has its own configuration options, described below.
Manual Location
For fixed installations where your dish doesn’t move. Search for an address or place name, click the map to drop a pin, or enter coordinates directly. Click Save Location to save. Your coordinates are stored locally and persist between sessions — you only need to set them once.
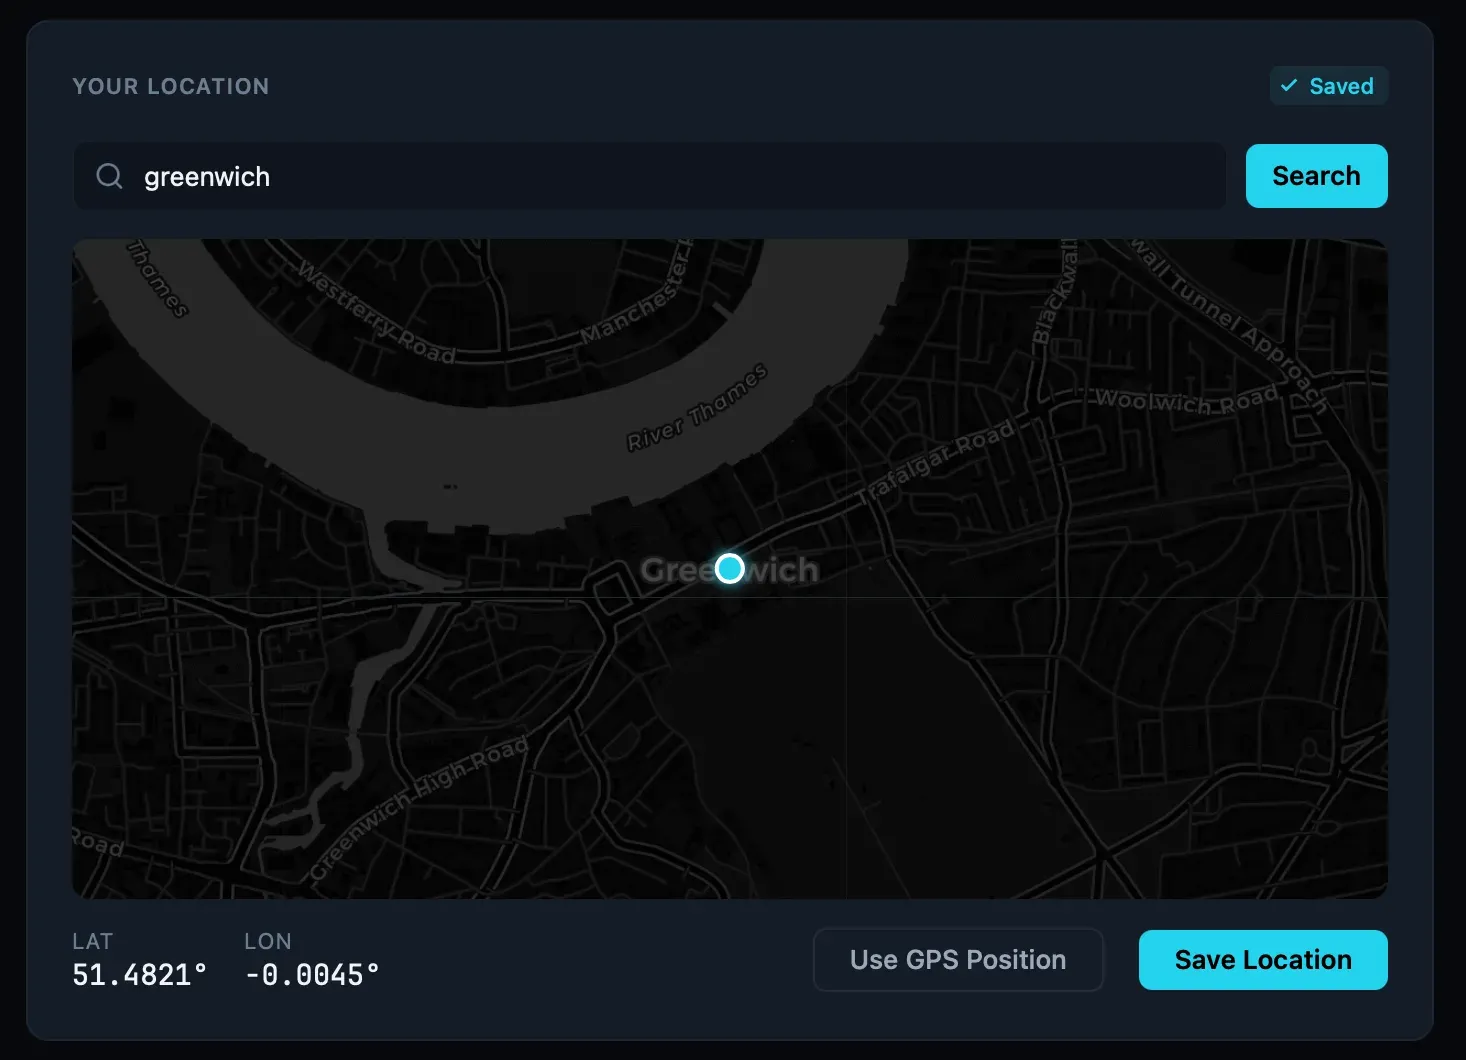
The manual location is always available as a fallback if no GPS source is connected.
Serial GPS (USB Dongles)
For mobile setups. Plug a USB GPS receiver into the machine running Nexus Telemetry and add a Serial (USB Dongle) source. Select the serial port from the dropdown and set the baud rate to match your device (common values are 4800, 9600, and 921600).
Nexus Telemetry reads standard NMEA 0183 sentences directly from the device. It supports both $GP (GPS-only) and $GN (multi-constellation) sentence prefixes. No additional software is required.
For USB GPS receiver recommendations, see our GPS receiver comparison.
NMEA over TCP
For setups where the GPS receiver is connected to a different machine on the network. Add an NMEA / TCP source and enter the host and port of the device forwarding NMEA sentences. Nexus Telemetry connects as a TCP client and reads NMEA data from the stream.
A common setup is a Raspberry Pi with a USB GPS dongle forwarding sentences using socat:
socat /dev/ttyUSB0,b9600,raw TCP-LISTEN:10110,reuseaddr,fork
NMEA over UDP
For broadcast GPS setups. Add an NMEA / UDP source and enter the port to listen on. Nexus Telemetry listens for NMEA sentences broadcast over UDP on the specified port. This is useful when multiple devices need to receive GPS data from a single source.
gpsd
For users who already run gpsd on their system. Add a gpsd source and enter the host and port of the gpsd instance (default: localhost:2947). Nexus Telemetry connects to the gpsd JSON protocol and subscribes to position updates.
Starlink gRPC
The original GPS source. Add a Starlink gRPC source and enter the dish address (default: 192.168.100.1:9200). Nexus Telemetry reads GPS coordinates from the dish’s local gRPC endpoint.
Note: This source requires the GPS sharing toggle to be enabled in the Starlink app. On newer hardware (V4, Mini) this toggle has already been removed, and SpaceX will disable the endpoint entirely on 20 May 2026. If you currently use this source, configure an alternative before that date.
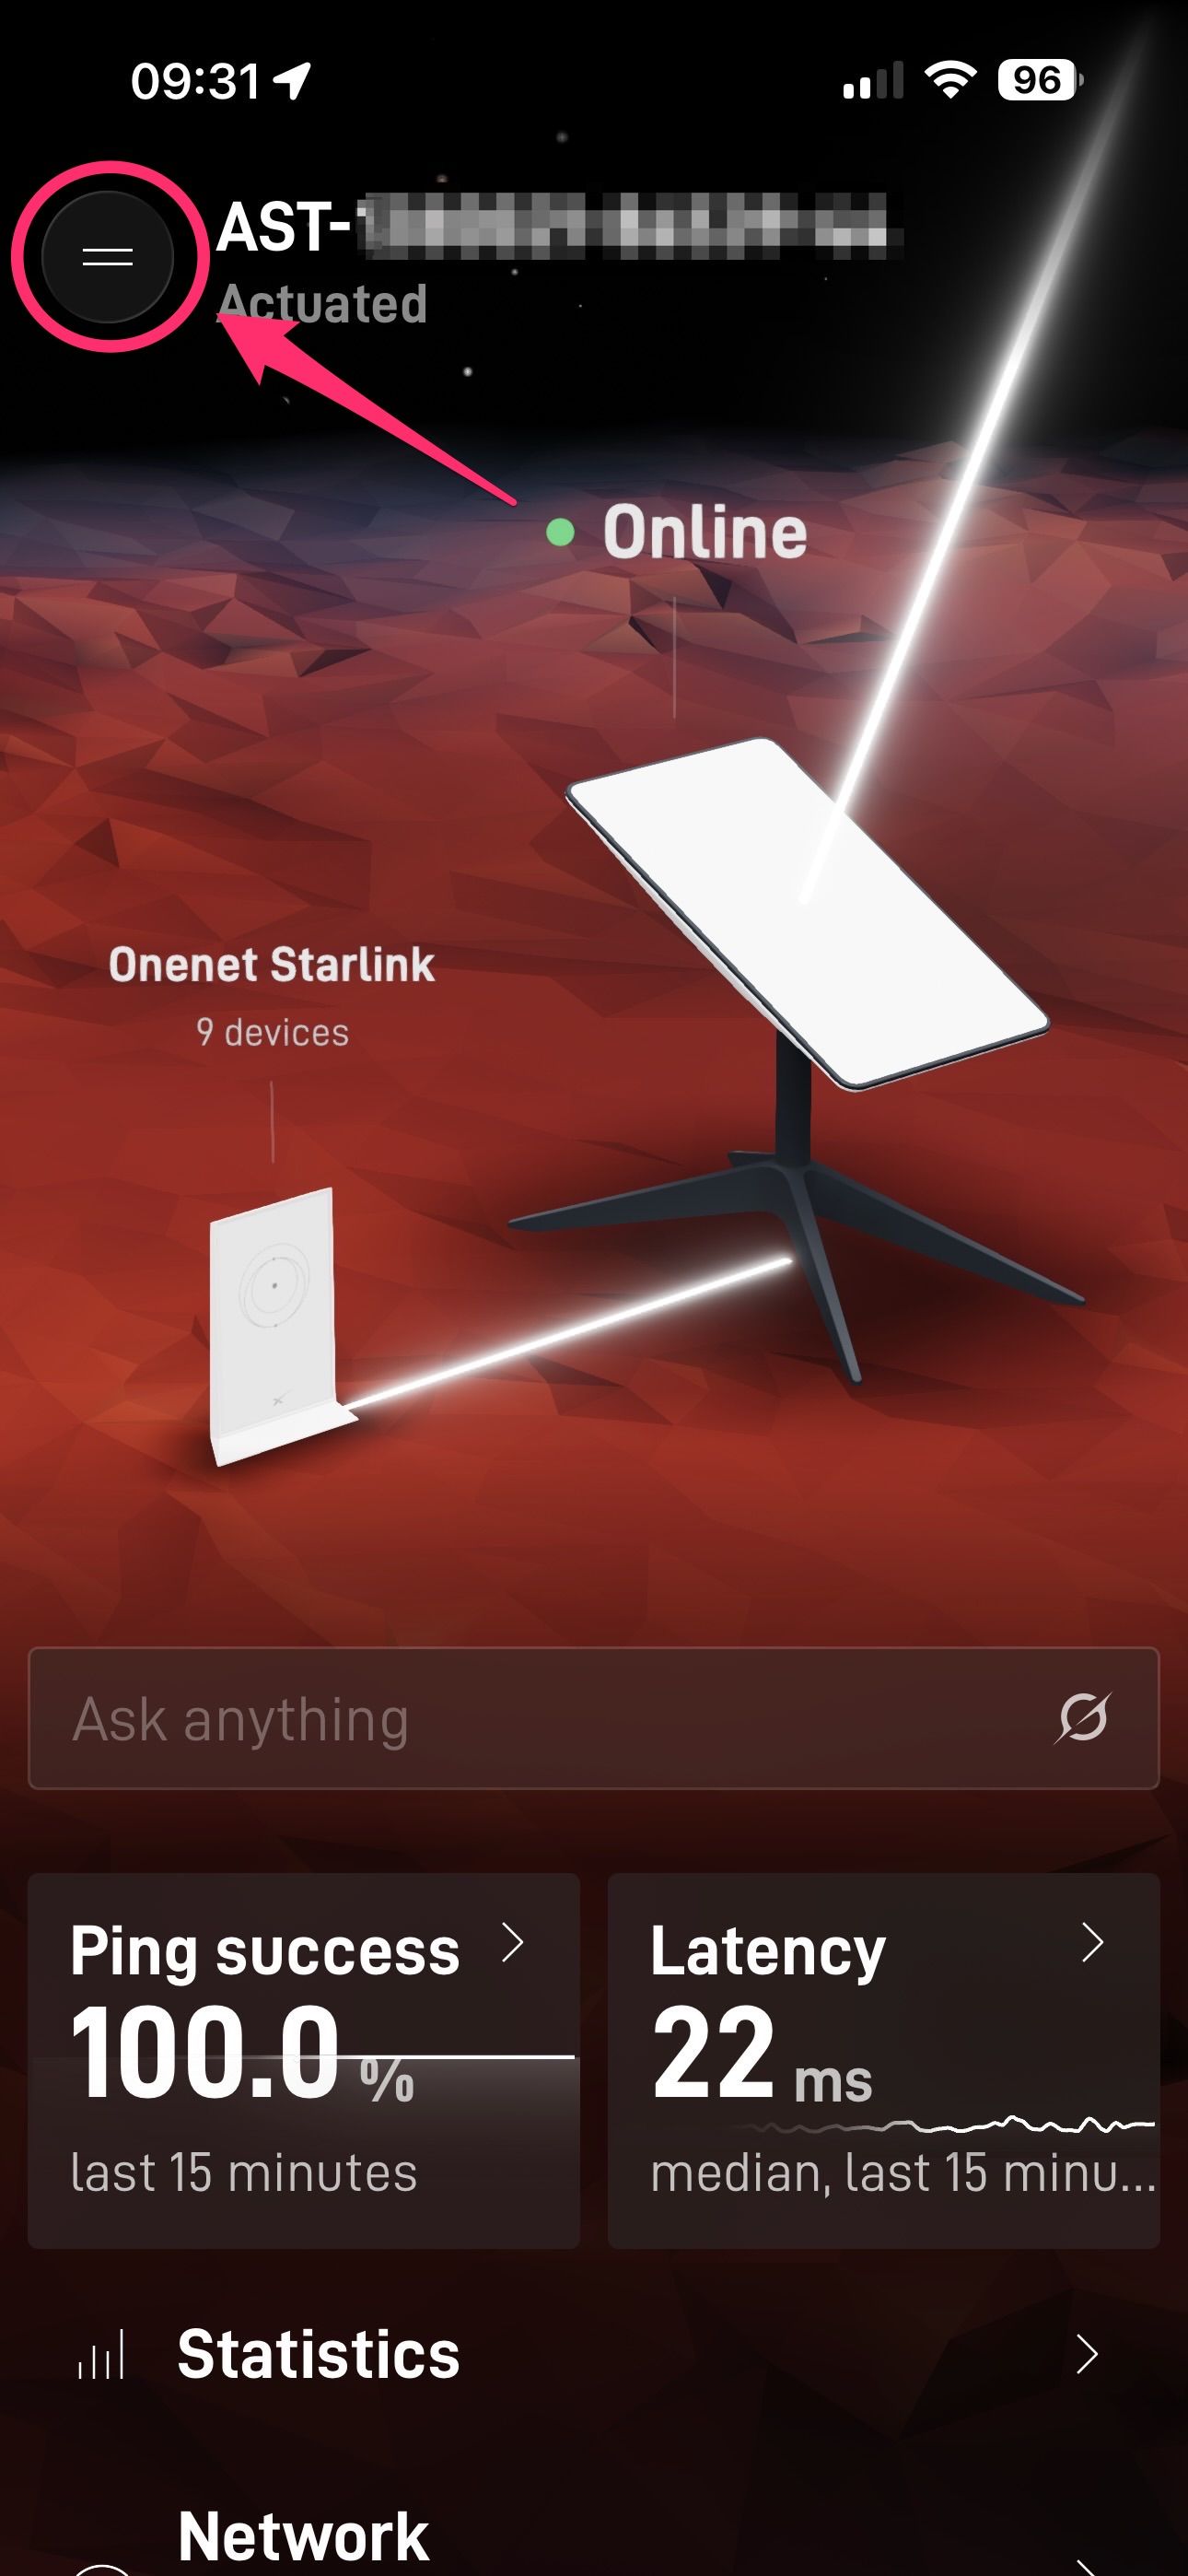
How to enable the GPS toggle (if still available)
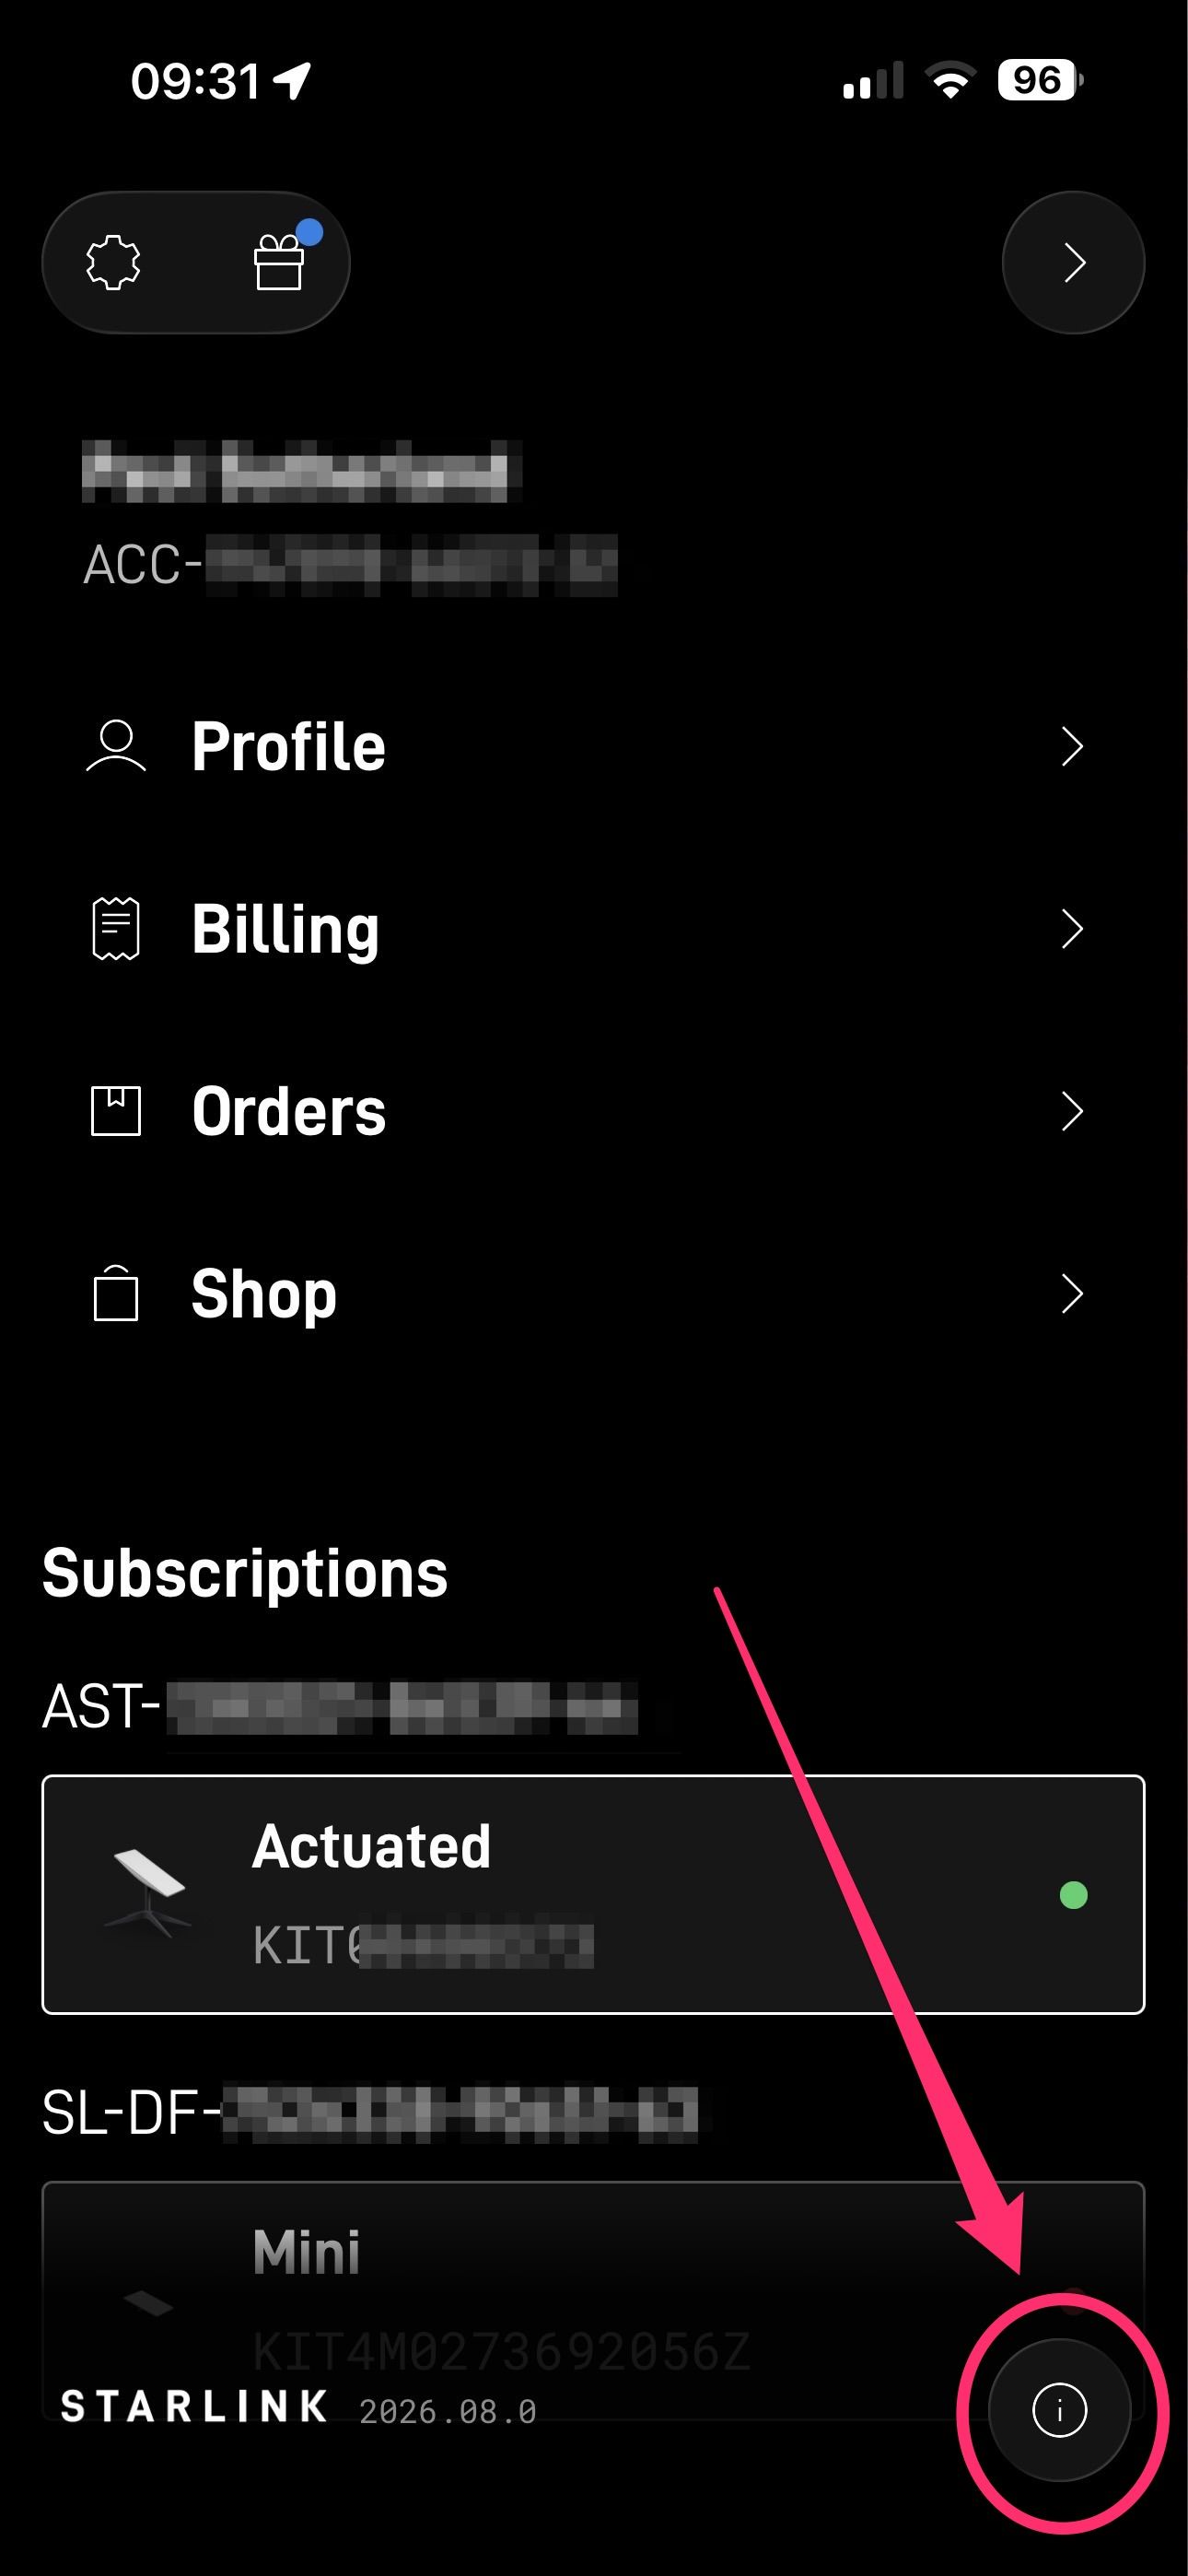
In the official Starlink app (iOS or Android):
- Tap the hamburger menu (three horizontal lines) in the top-left corner
- Tap the info button (circled “i”) in the bottom-right corner
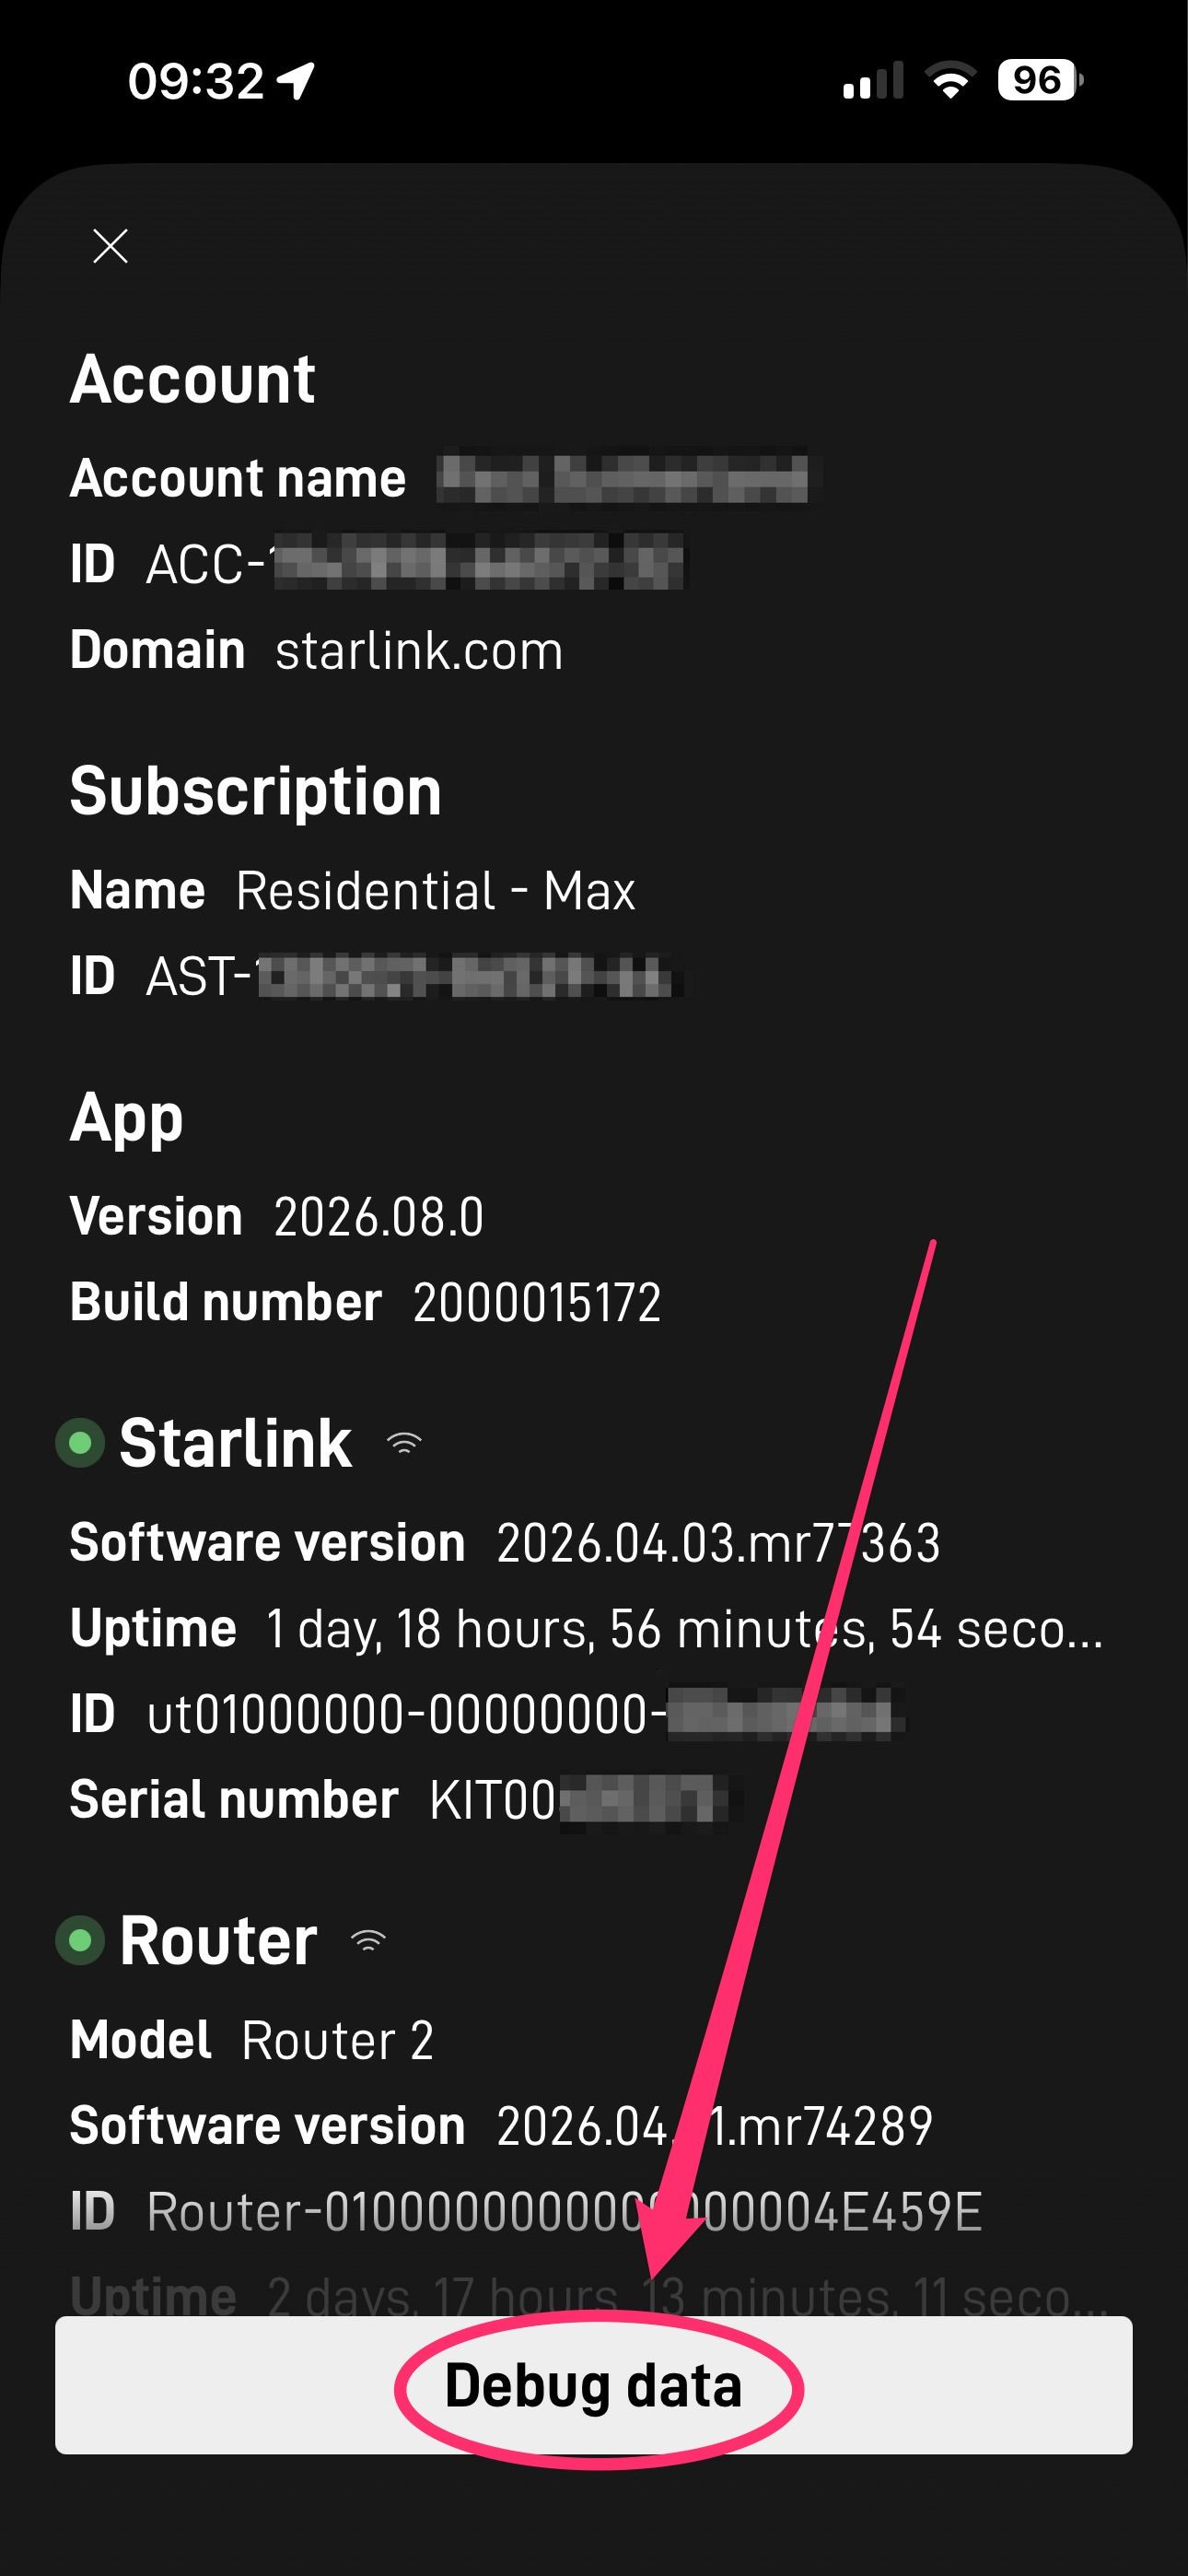
- Scroll to the bottom and tap Debug data
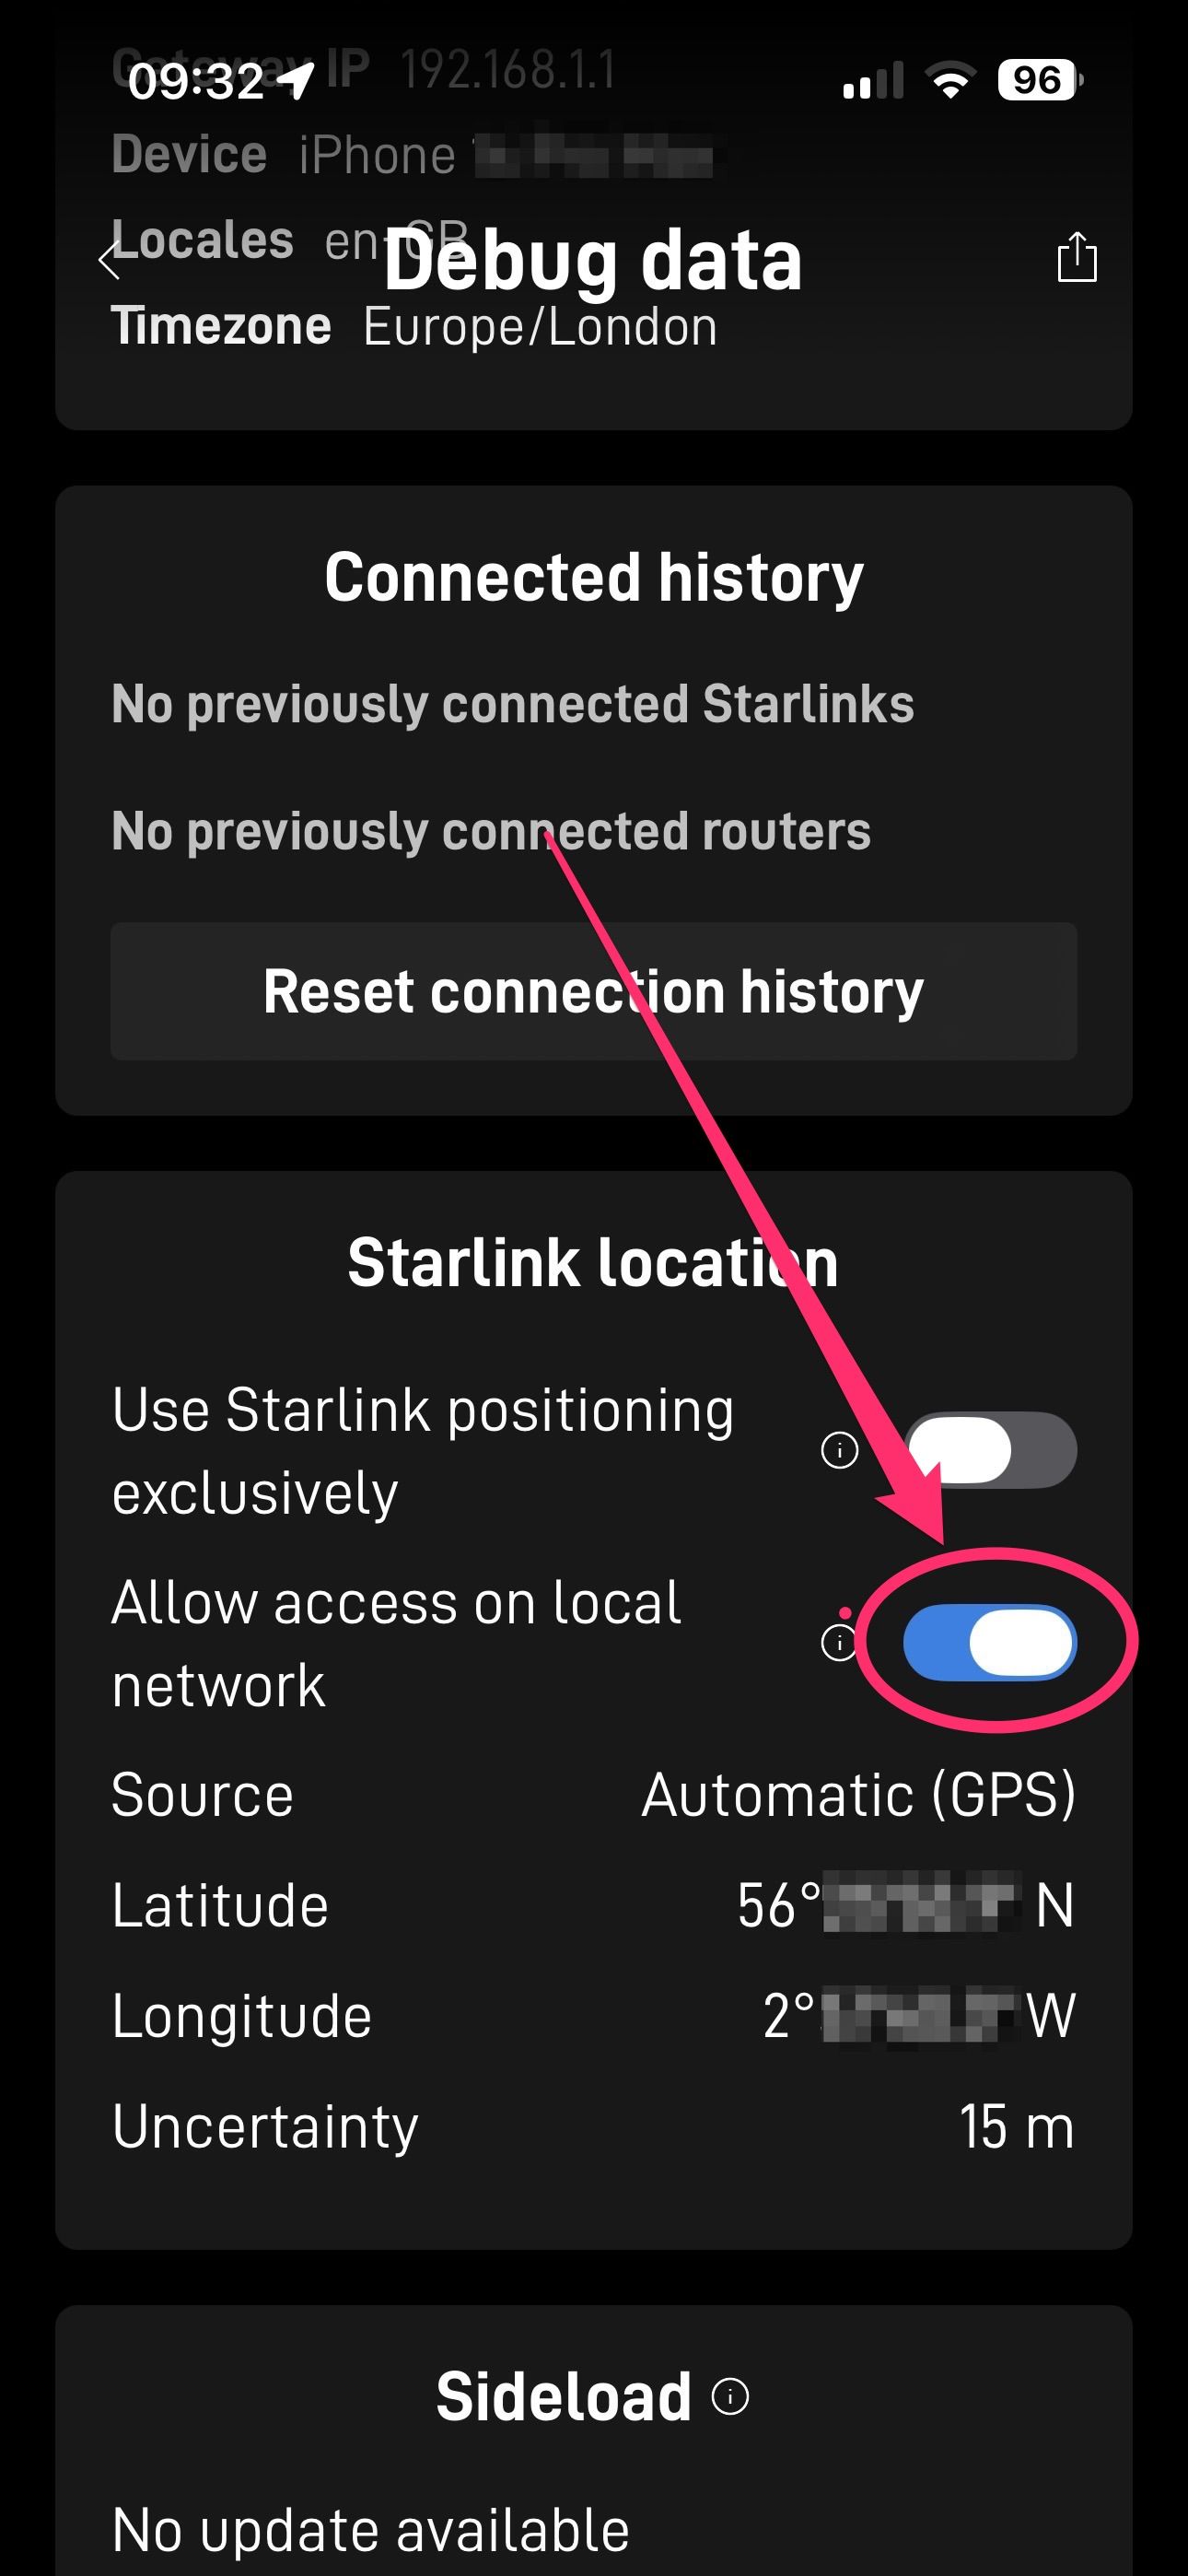
- Scroll to Starlink location and enable “Allow access on local network”
Auto-Fallback
When Auto-fallback is enabled (the toggle at the top of the GPS Sources section), Nexus Telemetry automatically switches to the next available source if your active source stops responding. For example, if a USB dongle is unplugged, the app falls to the next source in the list without interruption.
You control the priority order by reordering sources in the list. Nexus Telemetry works from top to bottom, using the first available source. The manual location is always used as the final fallback.
The dashboard shows which source is currently active and, for GPS sources, how many satellites are being tracked.
What Becomes Available
Once your location is set — via any source — you will see:
- Location card: Latitude and longitude with a mini map
- Weather card: Local weather conditions based on your position
- Starlink Viewer (Pro): Globe centred on your dish with satellite matching
- Session recording (Pro): Route mapping on recorded sessions
Troubleshooting
If location data does not appear in Nexus Telemetry:
- Check the source status: Open Settings → Geolocation and verify your source shows as Connected. If it shows an error, check the configuration.
- Serial sources: Ensure the USB receiver is plugged in and the correct serial port and baud rate are selected. Try unplugging and reconnecting the device.
- NMEA over TCP/UDP: Verify the forwarding service is running on the remote machine and that the host and port are correct. Check that no firewall is blocking the connection.
- gpsd: Confirm gpsd is running (
systemctl status gpsd) and that it has a GPS fix. Check the host and port in the source configuration. - Starlink gRPC: Verify the GPS toggle is enabled in the Starlink app (if still available on your hardware). Ensure Nexus Telemetry can reach the dish at
192.168.100.1(see Connection Issues). - Manual location: If no GPS source is available, set your location manually using the map in the Your Location section at the top of the Geolocation settings page.
- Restart Nexus Telemetry: Close and reopen the application to reset all connections.
For technical details on how GPS sources work in Nexus Telemetry, see our blog post on building multi-source GPS.